If you own a Gigabyte RX 5700XT OC 8GB (or Asus Strix 5700XT), do NOT follow this guide. Modding these GPUs might brick them. Follow this link instead: Best Settings for Gigabyte 5700XT
Follow first 5 chapters of AMD Ethereum Mining Guide before going to this guide!
Download Required Tools
To know more about these tools or to download them directly from igorslab, please click here. Scroll to the bottom of the page to find installers of these tools.
Install all the three applications.
Backing up BIOS
Before we start the modding process, make sure you have taken a backup of the existing BIOS, so that if something goes wrong, you may still restore the original bios using the backup file. To take backup, export your original BIOS with GPU-Z as explained in Ethereum Mining Guide at Chapter “BIOS MOD”.
Modding using Red BIOS Editor
Open Red BIOS Editor
Click on Load, and load the BIOS you just saved in the above step
Check if the selected GPU ID corresponds to the model number of the GPU. You need not change anything.
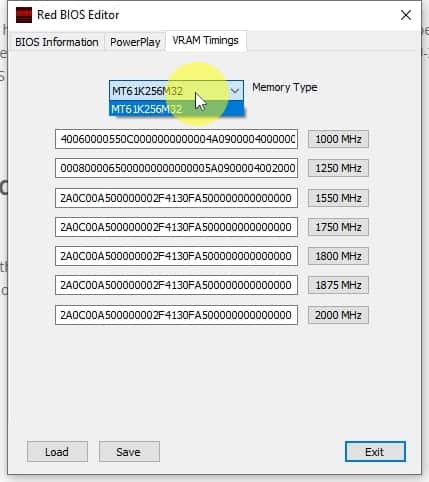
Click on VRAM Timings tab
Copy the value in the textbox against 1550 MHz
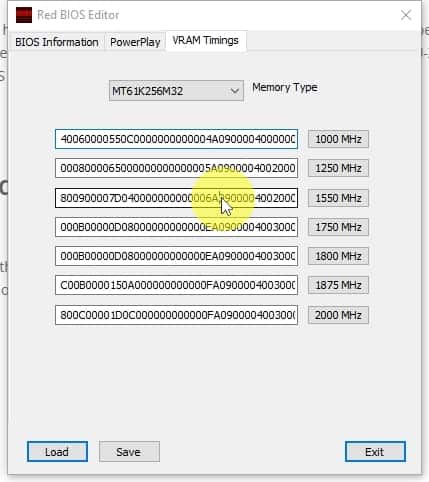
Paste the value in the box against 1750 MHz
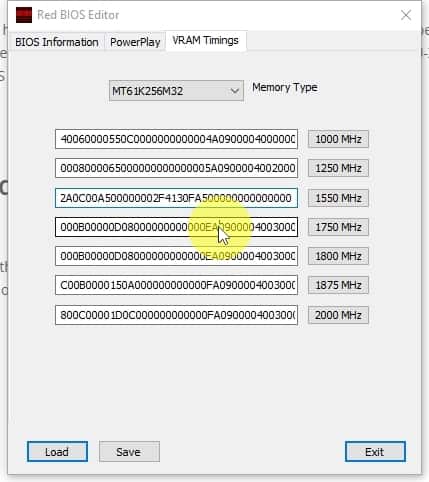
Similarly, paste the same value in the box against 1800 MHz and to all the other boxes below it.
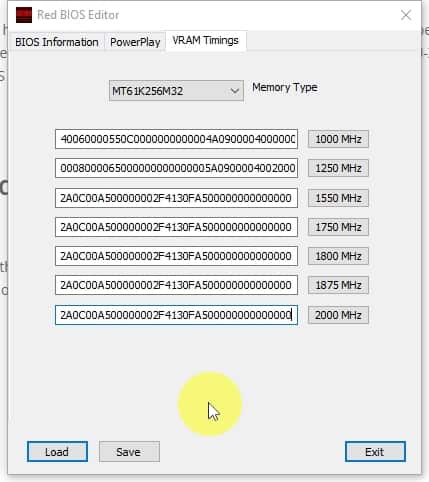
Some cards have one memory type, some cards have two memory types. Click on the dropdown menu against Memory Type and see if it has one or two types. If it has one, then you are all set, if it has two, select the other one and repeat the above three steps (copy value of 1550Mhz to all the boxes below it).
Save the settings as a new rom file. Modded_[name of your card] might be a good name to distinguish it from the original rom.
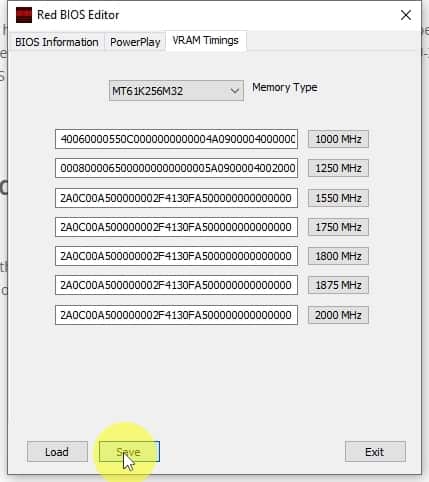
Our new BIOS Rom is all set.
Increase Power using More Power Tool
Why do we More Power Tool?
If you try changing the VRAM Tuning in Raedon settings, you would notice that the maximum frequency that we may set the VRAM to is 1900MHz. Similarly, there might be a lower cap on the minimum voltage you may set.
With the help of More Power Tool, we may uncap these values to set a higher VRAM frequency and lower core voltage. Although, I didn’t need it, as my cards go unstable even at the max/min values that are available in the raedon settings, hence, I do not need to uncap the limits and I do NOT recommend pushing these limits further using MPT .
However, a few people have had success in pushing the limits of the 5700XT cards even further than 1900MHz and lower than 750mV, so you may want to try with the maximum possible settings in raedon first, and if your card is stable at those values, only then try MPT to further push that limit.
- Open MorePowerTool, select your card and load the modded BIOS that you just saved from the step above.
- Click on ‘Power and Voltage’ tab, and reduce the minimum voltage(s) from 750mV to your desired settings.
- While you are it, you may also want to change the power limit of the GPU to something close to 180W.
- Click on ‘Overdrive Limits’ tab and change the Memory Maximum Clock from 950 to 1000. After doing so, you would be able to push your VRAM frequency to even further than 1900Mhz.
- Click on save and save the settings as .mpt file
Go back to Red Bios Editor, load the modded bios and click on PowerPlay tab in the red bios
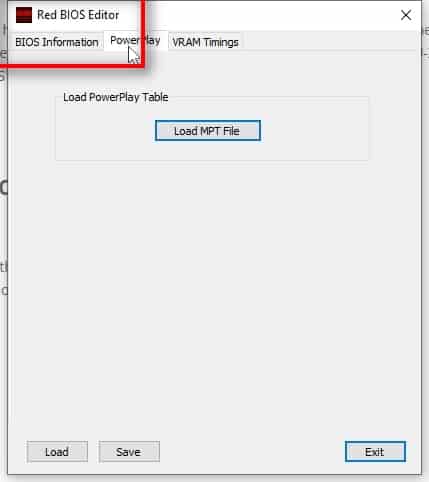
Click on ‘Load MPT File’ and select the file that we saved in the previous step
Click on Save to save the newly modded bios. Let’s name it REMODED_<your card name>
Flashing the BIOS
Now that we have the fully modded BIOS, we need to flash it back on the GPU.
- If you haven’t already, extract the Flash Tool
- Run insttool64 to install all the required binaries
- Copy the amdvbflash file to the folder where you had saved the fully modded rom in the above step
- Open command prompt as an administrator and change directory to the folder where you have the fully modded rom
For example,
– If the modded rom is located at E:\ModdedRoms\myModdedRom.rom,
– Copy amdvbflash.exe to E:\ModdedRoms\amdvbflash.exe
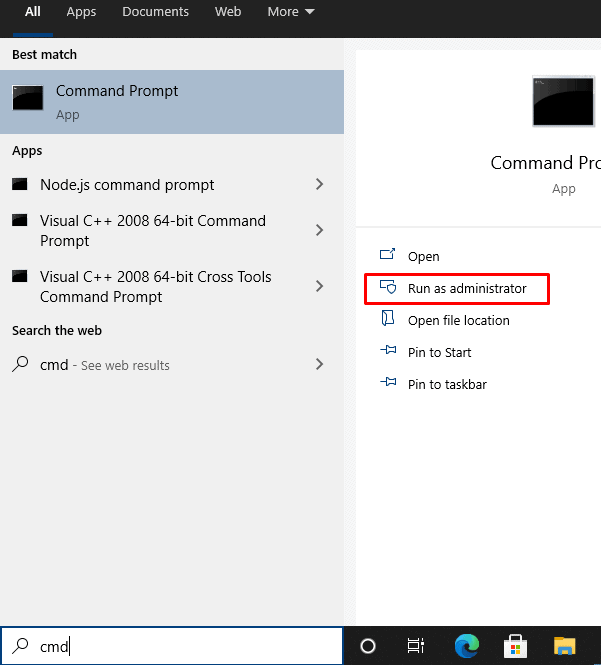
– Type cmd in windows search and click on Run as Administrator
– Type E:\ and press enter to change to E directory
– Type cd ModdedRoms and press enter to change directory to ModdedRoms
Now, type in the following command to view the list of connected GPUs. It is recommended you disconnect all the GPUs other than the one you are flashing to avoid any accidents.
> amdvbflash -i
This will list all connected GPUs. Note down the adapter number of the GPU that you want to mod. If you have disconnected all GPUs other than the one you are modding, this number would be ‘0’
Type the following command to unlock the GPU, so that it could be flashed
> amdvbflash -unlockrom 0
where, 0 is the number of the adapter you noted above
WARNING: Do not continue unless you know what you are doing. Doing this wrong may damage your GPU. The information on this site is provided “AS IS” and without warranties of any kind either express or implied. Continue on your own risk.
Flash the bios using the following command
> amdvbflash -p 0 remodded_[name of the mod file].rom
where, 0 is the gpu adapter that you had noted earlier, and remodded_…. is the name of the fully modded rom file.
After a few seconds, it would ask you to restart your computer to complete the update. Restart the computer.
Overclocking
Open AMD Raedon and navigate to manual tuning (see above to find steps to reach there).
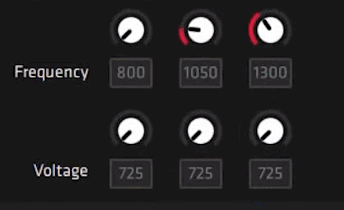
Set the voltage(s) to 725 and the max frequency to 1300
For max frequency on VRAM, you may also want to test it by increasing it by 25, mining for a few minutes, again increasing by 25 and so on, until the card crashes, and then reducing it back to the most stable value for your card. In my experience, 1800 should be stable for most of the cards (except for the GigaByte card)
Tweak the fan speed to whatever temperature/fan noise you are comfortable with. Ideally, the fan speed should atleast be enough to maintain the temperature lower than 60 degrees. The lower, the better.
Click on Apply Changes to save the settings.
Continue Ethereum Mining Guide from : “07 GPU Miner”